
Descrizione
With a few simple clicks, you can post a customized, interactive Google Map in your
blog. Follow these simple steps to post your map:
- Go to the ZeeMaps server (http://www.zeemaps.com) and create your map
- Add markers, regions to your map
- Add one marker at-a-time, using Additions->Add Marker menu item, or use Additions->Upload CSV to add multiple markers from a CSV file or Google Spreadsheet
- After your map is done, note the map number for your map (the number on the map URL after the parameter group=)
- Make sure you have the ZeeMaps plugin downloaded and activated
- Go to edit your blog entry
- In the second row for your blog editor menu buttons, you should see a new button with the Google marker icon
- Place your cursor in the location where you want to publish your map in the editor window
- Click on the Google marker icon button
- Enter your map number and customize your published map in the resulting dialog
- Click on the insert button
This should add some text to your blog like:
[zeemaps 45 w=100% h=500 add geosearch]
This text will be replaced by the map in your blog.
Screenshot
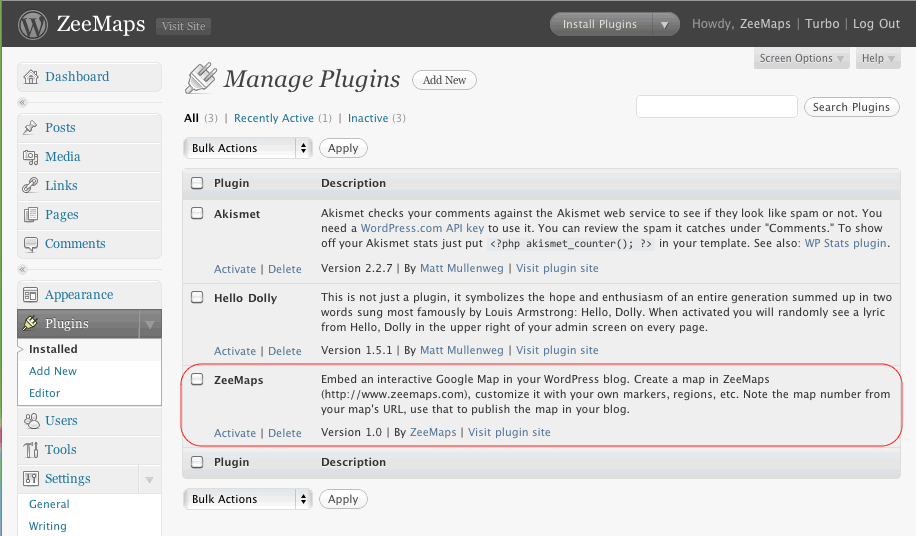
Shows the ZeeMaps plugin listed in the Plugins Admin page. 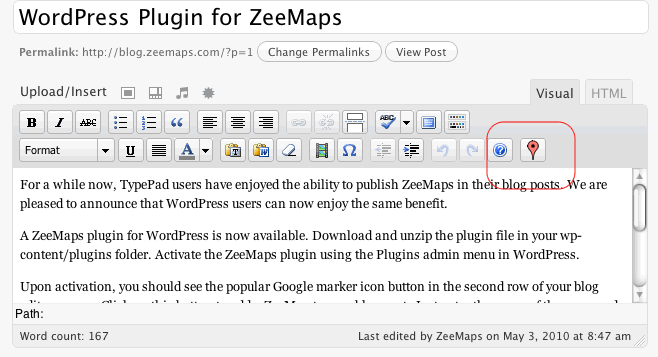
The Google Marker icon button for adding a ZeeMap to your blog. 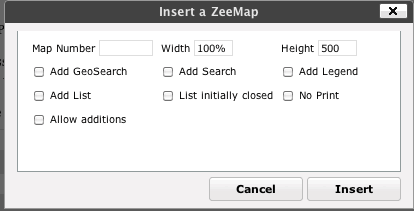
Dialog to customize your published map.
Installazione
- Upload and unzip
zeemaps.zipin the/wp-content/plugins/directory - Activate the plugin through the ‘Plugins’ menu in WordPress
Recensioni
Non ci sono recensioni per questo plugin.
Contributi e sviluppo
“ZeeMaps” è un software open source. Le persone che hanno contribuito allo sviluppo di questo plugin sono indicate di seguito.
Collaboratori
Traduci “ZeeMaps” nella tua lingua.
Ti interessa lo sviluppo?
Esplora il codice segui il repository SVN, segui il log delle modifiche tramite RSS.
Changelog
Version 1.0.0
- Initial Release
Version 1.1
- Fix button layout
Version 1.2
- Added x, y, z parameters for centering a map at a given longitude, latitude, and zoom
Version 1.3
- Added option for SimpleAdd, TopBar